Requirements for the design file to meet printing standards
Nội dung bài viết: [ Ẩn ]
In order to ensure the quality of printing products to achieve the best quality, with a low rate of deviation and damage, the design file used to transfer to the printer must meet the standards as printing is not the same as observed on computers or mobile phones. There is a myriad of factors that affect the quality of the finished product such as ink color, paper materials, printing technology,… It is crucial to know and understand the requirements of the design file. Here are 9 important requirements to keep in mind for design files to print.
Software used to design
Design and printing software
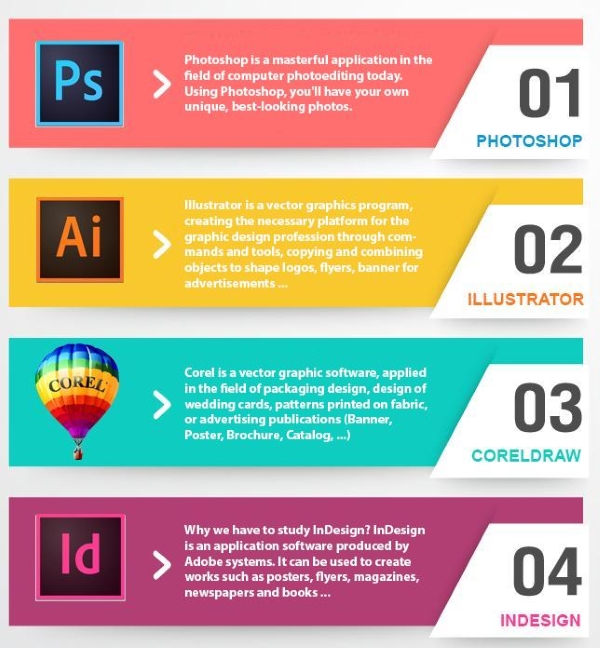
In order for the design files to be printed out with sharpness, clarity and without blurring, it is highly recommended to use specialized software designed for printing such Adobe Illustrator, Adobe Indesign, Corel Draw,… as these software use files, vectors, so you can zoom in and out comfortably. If using image files (.jpg, .png) to print, it will be blurred when enlarged.
Having standard sizes and overflow margin
How to make bleeding
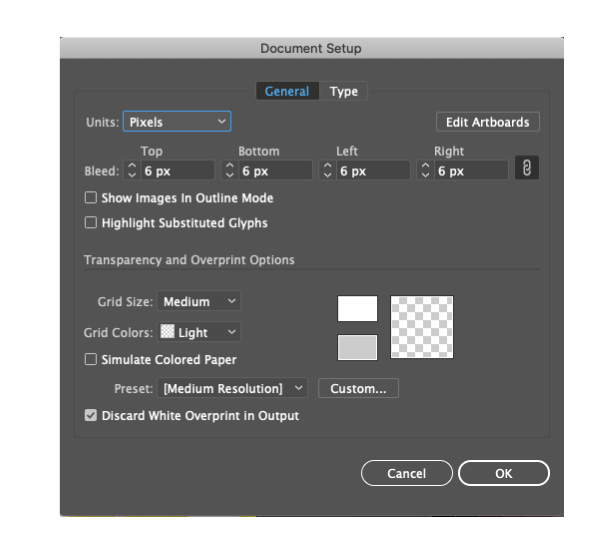
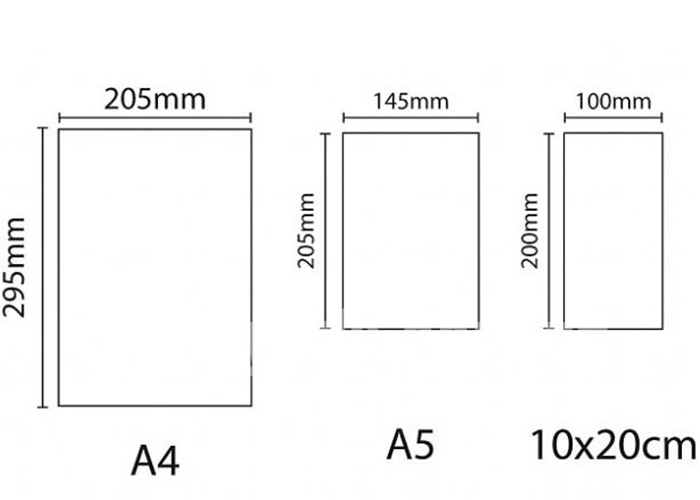
For each product, there will be a corresponding size. The design file needs to ensure the correct size so that when printed out, it is not wrong. Moreover, the design file needs to have bleeding to compensate for the finished product, at least 2mm in each direction. Because when the printing is finished, the product will be trimmed into small pieces.
To create the crop offset, you should go to File and Document Setup or use Alt + Ctrl + B to open the selection box, then enter complete parameters.
Using the CMYK color system in printing
The difference between RGB and CMYK color system
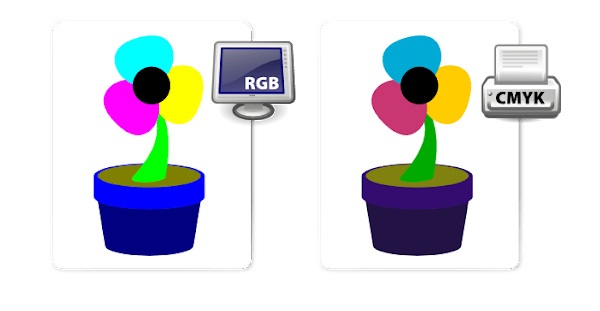
The two most common color systems are CMYK and RGB. If the RGB color system is used to display colors on electronic devices such as televisions, phones, computers,... CMYK colors are used in printing. CMYK corresponds to 4 colors:
- C = Cyan
- M = Magenta
- Y = Yellow
- K = Black
When printing to create different colors, these four primary colors will be mixed. This is also the reason why printed products are often a little different from the colors you see in your design.
Images in the design file
The image is not in the vector form, so it cannot be zoomed comfortably without changing the quality. Hence, the images used must be larger than or equal to the desired print size and have a minimum resolution of 300dpi.
The definition of the lines
Lines are too thin, less than 0.01mm, they may be invisible and cannot be displayed in the print. Therefore, it is necessary to carefully check the thickness of these lines before transferring to the printer.
Converting fonts to avoid errors
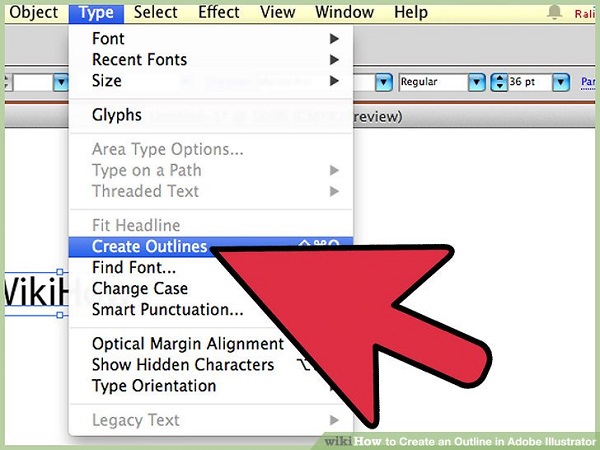
Converting font is the action of converting a font from the text (can be arbitrarily edited) into vector format (not editable). This prevents the font from being corrupted when switching from one device to another. Because sometimes the computer at the printing address does not contain fonts in your design, when converting fonts will not happen error.
To convert fonts, you can do the following:
- Select the text area you want to convert
- Choose File/Create Outlines or Use the key combination Ctrl + Shift + O for Windows or Command + Shift + O for Macbook (for AI files).
- Use Ctrl + Shift + Q for Windows and Command + Shift + Q for Macbook (for Corel files)
Distance between content and margin: 3mm
Design content such as letters, logos, motifs, ... should be at least 3mm from the margin for safety when cutting.
Checking View, Look, Over Print
It is necessary to check all layers in the design file to ensure that View, Look is not disabled. If you turn off these modes, this layer will be lost when printing. In addition, the Over Print mode must also be turned off before printing.
Export the file
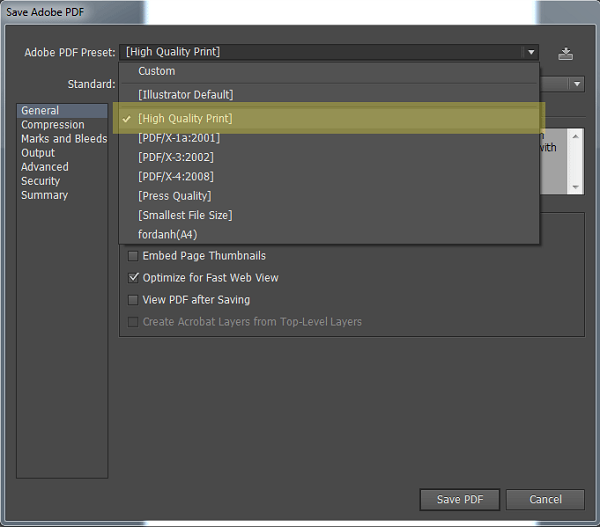
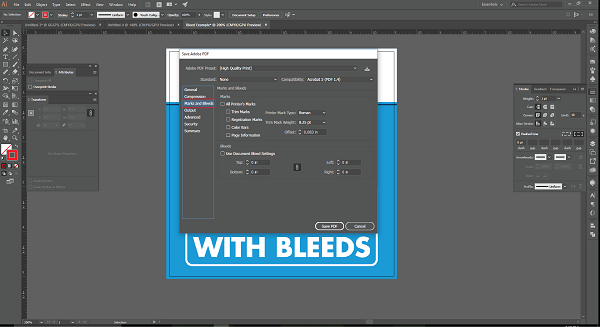
The final output file is in High-Quality Print PDF format and the bleed checkbox is checked to keep the cropping section convenient for the cropping step.
Select the High-Quality Print mode to export the print file
Turn on crop compensation
These are the basic requirements for printing and processing with the highest efficiency, to avoid damage to the product. Ensuring the design file meets the printing standards will help save time and money for businesses as well as printing parties to work effectively.
For more information, please contact Printgo immediately through:
- Hotline: 1900.633313
- Email: sale@printgo.vn
- Address: 19th floor, HCMCC building, 249A Thuy Khue, Tay Ho, Hanoi
- Website: printgo.vn
